- Quick Action / Practical Summary
- Who this guide is for
- Why a family drop zone matters (short)
- Where to place a drop zone in small Indian homes
- Step-by-step setup: a simple, repeatable plan
- Printable-style checklist
- Worked mini-example: 30-minute setup for a 4-member 1BHK
- Practical options by budget and permanence
- Everyday habits and maintenance
- Common mistakes and how to avoid them
- Safety and electrical tips
- Related setups and small-space ideas
- Next step
- Conclusion
- Frequently Asked Questions
- Indian Spice Storage System for Daily Use: Refill Stock and Labels
- Use this plan in your own home
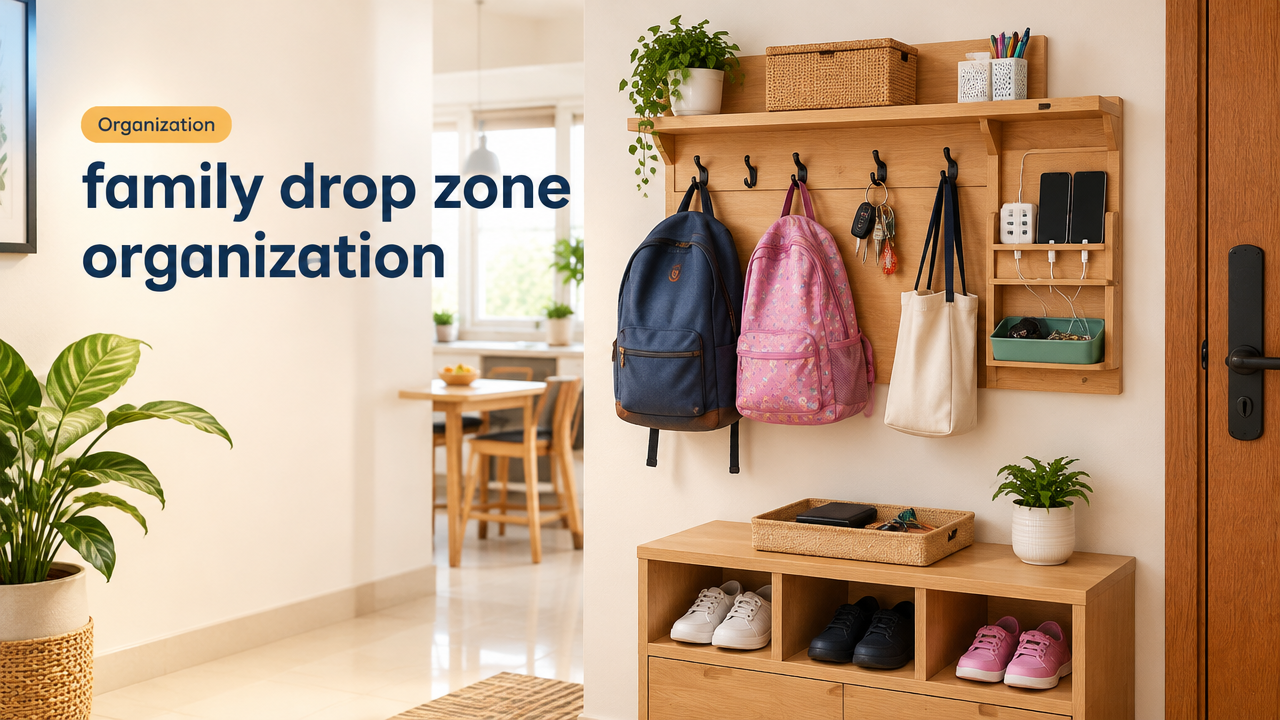
Family drop zone organization for keys, bags, school items and chargers
Updated/Reviewed: 15 October 2026
Quick answer: Choose one small, visible spot near your main entrance or kitchen door, add clear hooks or cubbies, a simple charging station and a tray for loose items. Keep rules short (1 item in, 1 out for each person) and run a 5-minute reset each evening.
Who this guide is for
This practical guide is for Indian households—single flats, small apartments and houses—where keys, school bags and phone chargers often go missing before leaving the house. It focuses on low-cost, low-footprint solutions that work in small spaces and busy family routines.
Why a family drop zone matters (short)
- Reduces time wasted searching for keys, wallets and chargers.
- Keeps high-traffic areas tidy so mornings run smoother.
- Helps children learn where to put school items and reduces last-minute stress.
Where to place a drop zone in small Indian homes
Pick one location—consistency is more important than having multiple stations. Typical choices:
- Main entrance wall or inside the entryway.
- Near the kitchen entrance (many families pass through kitchen before leaving).
- Small console or floating shelf in a hallway or next to the shoe rack.
Visibility is the key rule: place it on a sightline people naturally pass each day.
Step-by-step setup: a simple, repeatable plan
- Clear and decide (15–20 minutes): Empty the chosen spot. Sort items into: keep here, put elsewhere, recycle/throw/donate.
- Design the layout (5 minutes): One hook per person for bags; one lower hook or basket for children’s school bags; a small bowl or dish for daily loose items (keys, coins); a dedicated tray for masks and water bottles if needed.
- Install basic fittings (15–30 minutes): Mount hooks, a small shelf or a narrow cubby. Use adhesive hooks for rented homes or drill for heavier items.
- Set up chargers (10–20 minutes): Fit a compact multi-port USB charger or power strip on the shelf. Tape wire routes to avoid tangles and label each cable with the family member’s initials if useful.
- Label and train (5 minutes): Add name tags or simple labels for each hook/cubby. Tell family members to place items in their spot every time they enter the home.
Printable-style checklist
- Choose the drop zone location near the most-used exit.
- Clear the space and sort what belongs in the zone.
- Install 3–5 hooks (at different heights if needed).
- Add one small shelf, tray or wall-mounted box for chargers and loose items.
- Set up a multi-port charger or power strip; secure cables safely.
- Label hooks/cubbies and the charging port(s).
- Introduce a 5-minute evening reset habit for everyone.
- Review and declutter monthly using a one-in-one-out rule.
Worked mini-example: 30-minute setup for a 4-member 1BHK
Goal: a functioning drop zone with hooks, a tray, and a charging point.
- 0–5 min: Choose wall beside main door (easy visibility).
- 5–15 min: Use adhesive 3M hooks—install 4 hooks at convenient heights: two for adult bags, one at child height, one for keys/face masks. Place a shallow wooden tray on a narrow shoe rack shelf below for loose things.
- 15–25 min: Plug an 18W 4-port USB charger into the nearest socket on the wall behind the shoe rack; run cables discreetly and secure with cable clips.
- 25–30 min: Label hooks: A (mom), R (dad), S (son), keys. Add a simple rule note: “Place bag and phone here every time you return.”
Result: Functional drop zone in 30 minutes, under INR 1,200 if using affordable hooks and a basic multi-port charger.
Practical options by budget and permanence
| Type | Best for | Approx cost (India) |
|---|---|---|
| Adhesive wall hooks + tray | Rented homes, no drilling | INR 300–900 |
| Small console table + multi-port charger | Permanent, neat display | INR 1,500–4,000 |
| Pegboard or modular cubby | Custom layouts, many items | INR 1,200–5,000 |
Everyday habits and maintenance
Short habits keep the drop zone working:
- 5-minute evening reset: everyone checks their hook/cubby before bed (this is faster than hunting in the morning).
- Monthly quick declutter and dusting; remove unused items and tangles of cables.
- Use a one-in-one-out rule for bulky extras (link to a short decluttering method: One in One Out Decluttering Rule).
Common mistakes and how to avoid them
- Putting the drop zone out of the main traffic flow—choose a visible spot instead.
- Overloading with too many functions (don’t turn it into a storage dump for rarely used items).
- Using long loose charger cables—use short labelled cables or cable ties to avoid tangles.
- Skipping labels; names or icons help children and guests use the system.
Safety and electrical tips
- Use a multi-port USB charger with overload protection where possible.
- Keep power strips off the floor and away from shoes and water—mount on the shelf rear or a wall bracket.
- If you need new wiring or a socket closer to the drop zone, hire a qualified electrician—do not attempt unsafe DIY electrical work.
Related setups and small-space ideas
For more compact organization or to elaborate the drop zone into a small foyer station, see ideas for vertical storage and kitchen routine ties:
- 17 Smart and Powerful Vertical Storage Ideas for Small Homes That Save Space
- 21 Powerful Small Kitchen Counter Organization Ideas
- To make the drop zone part of a smoother evening routine, see: Evening Home Reset Routine That Makes Mornings Easier
Next step
Set aside one 30-minute window this weekend. Use the printable checklist above, mount basic fittings, label each spot and introduce the 5-minute evening reset for one week. Tweak heights and add a charging cable or tray only if the system is being used regularly.
Conclusion
A well-positioned family drop zone saves minutes—and stress—every day. Pick visibility over perfection, install simple fittings and practise a short evening reset. Small, consistent habits and labelled spaces make the system stick so mornings become easier for everyone.
Frequently Asked Questions
Next guide suggestion: 21 Powerful Small Kitchen Counter Organization Ideas
Use this plan in your own home
Treat the guide as a practical starting point and adjust it for your rooms, materials, appliances, climate, family size and daily routine.
How this guide was prepared
This guide is prepared for everyday readers using practical research, usability checks and editorial review. Product-specific claims should be verified against manufacturer instructions before purchase.
- Reviewed: October 15, 2026
- Next review target: April 15, 2027
- Read our Editorial Policy · Request a correction
How did you like this article?
Your feedback helps us make our stories more useful.

Ashish Pandey
My name is Ashish Pandey, I work as a content writer and I love to write articles. With 4 years of blogging experience I am always ready to inspire others and share knowledge to make them a successful blogger.
Related Articles
 Organization
How to Declutter Your Home Room by Room
A calm step-by-step approach to sorting clutter without trying to reorganize the entire home in one day.
 Kitchen Organization
12 Smart Ways to Organize a Small Kitchen
Simple storage and layout ideas that make a compact kitchen easier to use every day.
Join the Discussion
Join the conversation and share a useful tip or experience.